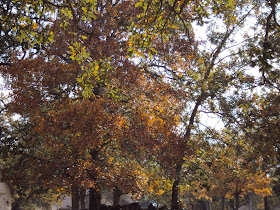
Happy Fall Everyone! Its not super cold here but there is cooler temperatures down our way. It has been mid 70's and just gorgeous outside. This morning when I woke up and opened all the blinds to let in the light I noticed that the trees in the backyard are changing colors. Keep in mind that in our area we really dont have a change of seasons. It usually works this way. Super hot one day, then a cold front blows in, its cold for one or two days then back to super hot. Thats pretty much it in a nutshell. The trees in our backyard looked so pretty that I had to go outside and take a few pictures to show you. They looked really pretty with all the different shades of fall. This is my favorite time of year!

My backyard!

My sideyard!

My pretty little BellaGrace keeping watch. Shes a sweet little doll and she is just enjoying the sun.

Charlie watching the dogs behind us making sure that he is ready if they want to play.

I went to Wimberly Market Days this weekend with some great girlfriends and I found this bleeding heart plant. I have tried to grow it before and had no luck. We shall see this time. It is beautiful right now. I re-planted it in a bigger pot and it perked up. I hope that I can protect it through our harsh winter. Ha!
With the cooler temperatures settling in I am reminded of when I was a kid and my mother would make this spice tea. This is a truly southern recipe that is very popular. It is also a great gift for teachers, girlfriends and just to make for yourself.
Here are your ingredients:

Just put them all in a bowl...

Mix the ingredients thoroughly with a fork until well blended.

Put in an airtight container until ready to use. So simple! So tasty! This recipe can easily be doubled or tripled.

Add a heaping tablespoon per coffee cup full of steaming water.

This is great for a winters day. It will warm you from the inside out!
 I probably wont be posting this week due to the preparations for Thanksgiving at my house, but I wanted to take a minute to wish you all a wonderful, fun filled, blessed Thanksgiving. My wish for you all is to be surrounded by the love of family and friends and of course, great food. I have my menu planned out and have been soaking up all the wonderful Thanksgiving posts of my blog friends. When I am using your recipes this week I will be saying a little prayer for each of you, that you all are having a beautiful day filled with what we are thankful for all year long!


 Mix your sugar, cornstarch and salt in a saucepan, gradually add your 3 c. milk
 Stir constantly...
 Keep on going....til it thickens and boils for one minute.


 Charlie watching the dogs behind us making sure that he is ready if they want to play.
 I went to Wimberly Market Days this weekend with some great girlfriends and I found this bleeding heart plant. I have tried to grow it before and had no luck. We shall see this time. It is beautiful right now. I re-planted it in a bigger pot and it perked up. I hope that I can protect it through our harsh winter. Ha!


