3 girls, me, and a recipe

Welcome! I hope you enjoy reading about the passions in my life, my family, cooking, gardening, my pets and making memories that my girls will pass on to their children.

Monday, December 29, 2008

Lemon Blossoms/Flops


Happy Monday to all! Have you guys ever come across a recipe that is so easy that you feel like you cant mess it up? I have had this recipe for awhile and with all the down time around here after the holidays I thought I would try it. As you can see by the ingredients pic that it utilizes a cake mix and I just love recipes that do that. I guess I was trying to hurry I am not sure. I filled the little muffin pans too full. When they say only use a tablespoon of the batter in the muffin cups they really mean it. The first half of this batter came out of the muffin holes and left me with these mushroom looking mini-muffins. Sort of how my stomach looks over my jeans after this bountiful holiday. This really is an easy recipe and I must say that the taste (not the look) was very good and light.
Lemon Blossoms
1 box yellow cake mix
1 box instant lemon pudding
4 large eggs
3/4 cup vegetable oil
Glaze
4 cups sifted powdered sugar
zest of one lemon
3 tbsp. vegetable oil
1/3 cup fresh lemon juice
3 tbsp. water
Preheat oven to 350 degrees. Spray mini muffin tins with non stick spray. Combine cake mix, pudding, eggs and oil and blend until smooth (batter will be thick). Drop NO MORE than 1 tbsp. batter into each muffin tin. Bake about 12 minutes. Turn onto a tea towel.
While muffins are baking, mix glaze. Sift powdered sugar, then add lemon zest, oil, lemon juice and water. Mix until smooth.
Dip the warm muffins in the glaze and set on a wire rack (make sure there is waxed paper under the rack). It takes at least an hour for the glaze to harden. Store in an airtight container. Makes 60 muffins.


Heres your ingredients. Simple. Simple.


Mix up your batter. It will be a little thicker than when you make a cake. I used a cookie scoop to put it in the muffin tins. Just make sure your scoop is only a tablespoon size.

Okay, now this is where I got a little frustrated. No, alot frustrated. There is no picture of me having to pull them out of the tin with my fingers. Nice.

This is your ingredients picture for the glaze.. Again, very easy.

Here is your glaze. It is very thin, but perfect for dunking that little muffin in.

This is the ugly batch. They are not supposed to be the size of a cookie across the top.

This was a little closer to what they were supposed to look like. They did taste good. Eh, tomorrow is another day!

Sunday, December 28, 2008

You wont even think straight if you eat these!!

Hi everyone, I hope everyone is recovering nicely from the holidays. All the great food and relatives and too much of almost everything. I absolutely love the holidays but I also love to see them go away! Last night I was finally in the mood to cook just for pleasure again. We are such party animals that I found myself in my kitchen looking through recipes. I had printed this one awhile back when I first found it. There is an amazing blog that I have been following that has everything on it. It is called The Pioneer Woman Cooks. She is remodeling a guest house/lodge on her property and it is just ultra fabulous. I feel like I have been there with her and she has had a step by step on the process. Go check it out at http://www.thepioneerwoman.com/. I found these cinnamon rolls on her site and I knew someday I would make them. I have tried tons and tons of cinnamon rolls and the were all basically the same. These are different. They are the best I have ever had.The thing that kills me on these is the frosting. Not that the dough isn't just delicious but....well, you just gotta try it. I made half of her recipe because hers made 7 pans!! I still ended up with 4, but let me tell you. Its really okay....LOL!


I really had fun making these. I know that sounds lame but they are so loaded down with the filling that I found myself smiling. This is after the dough is made, rolled out slathered with butter, sprinkled with sugar and a bunch of cinnamon. Lawdy Lawdy. I feel a little faint just reliving it.

Okay. My husband, daughter and I couldnt really contain ourselves after they came out of the oven. I let them cool a little then poured the icing on. The recipe calls for maple flavoring but its not our favorite. I just used vanilla but next time I WILL use the maple. Odd ingredient: brewed coffee. Seriously kids, this is to die for. I couldn't even get the pic fast enough before they were poppin' them out of the pan and into the mouth!

Pioneer Womans Cinnamon Rolls

1 quart of whole milk

1 cup of vegetable oil

1 cup of sugar

2 packages dry yeast

8 plus 1 cup all purpose flour

1 heaping tsp baking powder

1 scant teaspoon baking soda

1 heaping teaspoon salt

3-4 cups melted butter

2 cups of sugar

generous sprinkling of cinnamon

Frosting: 1 bag of powdered sugar, 2 teaspoons maple flavoring, 1/2 cup milk, 1/4 cup melted butter, 1/4 cup of brewed coffee, 1/8 teaspoon salt.

Mix the milk, vegetable oil, and sugar in a pan. Scald the mixture (heat just before boiling point). Turn off heat and leave to cool 45 minutes or so. When the mixture is lukewarm to warm, but not hot. sprinkle both packages of yeast. Let this sit for a minute. Then add 8 cups of flour. Stir mixture together. Cover and let rise for at least an hour.

Add 1 more cup of flour, the baking powder, baking soda and salt. Stir mixture together.(At this point you could cover the dough and put it in the fridge until you need it-overnight or even a day or two, if necessary. Just keep your eye on it and if it splurges out of the bowl just punch it down.)

Sprinkle surface generously with flour. Take half the dough and form a rectangle. Then roll the dough thin, maintaining a general rectangle shape. Drizzle 1 1/2 to 2 cups of melted butter over the dough. Now sprinkle 1 cup of sugar over the butter followed by a generous sprinkling of cinnamon. Now, starting at the opposite end, begin rolling dough in a neat line toward you. Keep it relatively tight as you go. Next, pinch the seam to the roll to seal it. Spread 1 tbsp. melted butter in seven round foil cake or pie pans. Then begin cutting rolls approximately 3/4 to 1 inch thick and laying them in the buttered pans. Repeat this process with the other half of the dough. Let the rolls rise for 20 to 30 minutes, then bake at 400 degrees until light golden brown, about 15 to 18 minutes.

For the frosting mix together all ingredients listed and stir well until smooth. It should be thick but pourable. Taste and adjust as needed. Generously drizzle over the warm rolls. Go crazy and dont skimp on the frosting!!

Wednesday, December 24, 2008

Merry Christmas To All!!

I wanted to take a minute this morning before the Christmas festivities begin and pass on some Christmas Cheer! I hope everyone has blessed holidays and get to enjoy the beauty of this season. I like to think of the new year as a great time to clean the slate and start off just the way you want to and to make this next year exactly the way you intended, however that may be. I hope everyone has a Very Merry Christmas and a Happy and Safe New Year!!
Love,
Joan

Sunday, December 21, 2008

Pecan Cobbler-Oh! So Sweet!

Happy Sunday everyone! I havent been able to post too much on account I have been so busy. I think I am finally done shopping. I am one of the weird ones that doesnt really mind the crowds. I think its because I love people watching. I can go to the mall and get a cup of coffee and sit there and watch people for hours.
Last weekend my husband and I and our friends Priscilla and Ron got up very very early and went to College Station, Texas to watch a dear friend of ours daughter graduate from Texas A&M. I graduated high school with Shelly and my husband and I babysat her beautiful baby girl Megan when she was an infant. Now, she has a Bachelor Degree in Interdisciplinary Studies. Jeesh. I am so proud of her even though I cant believe that I am that old! After the ceremony a large group of us went to a restaurant there in College Station, a wonderful steakhouse (I had my usual, chicken fried steak). For dessert my husband and I split a pecan cobbler with vanilla ice cream. Well, I couldnt quite get over it so when I got home that evening I had to make one. I have never made one before and this certainly will not be the last time. BEWARE: It is very sweet. I am a fan of almost any cobbler but I have to say, the ones with a real crust are just my favorite. I hope you enjoy this as much as we did!
Pecan Cobbler
2 1/2 cups light corn syrup
2 1/2 cups granulated sugar
1/3 cup butter, melted
1 tablespoon vanilla extract
5 eggs, slightly beaten
3 cups pecans coarsely chopped
Cobbler Crust:
1 cup oat flour (1 cup oatmeal processed to a fine powder)
1 cup all purpose flour
1/2 cup butter
1/4 teaspoon salt
1/4 to 1/2 cup water
Preheat oven to 350 degrees. Spray 13x9 inch pan with non stick spray. In a large bowl, mix together, syrup, sugar, butter, vanilla and eggs until well combined. Pour 1/3 of this filling mixture into the bottom of the prepared pan. Add pecans to remaining mixture and set aside.
In a medium bowl mix the flours and salt. Cut cold butter into small pieces and add flours. Combine with a fork or pastry cutter. Add cold water a little at a time until dough forms and sticks together. Place on a lightly floured surface, knead a little and roll out into a 13x9 square. Place this on top of filling mixture in the pan. Pour remaining filling (with pecans) on top of dough. Bake 50 minutes until center starts to set. Cool about 20 minutes.


Pecan Pie is my mothers specialty and this does taste similiar to a pecan pie. Its very good but I think it is probably a holiday recipe only at our house. I think it would be better to also cut this recipe in half. This makes a good sized pan and serves alot of people because you cant eat a very big piece.

These are your ingredients.

This is the filling after you have put the first 1/3 in the pan. This is after the pecans are added.

Work the flours and salt together with water to make your dough. This is made with the oat flour and it really gives it a different taste. It is super tasting.

This is the dough as I am trying to make a square!

After placing your dough square (or squarish) add the filling with the pecans.

The baked cobbler, oh my, oh my.

Get a load of that crust in there. My very favorite part.

Thursday, December 18, 2008

I got an award! Gosh, I just love that......

I got an award from Nicole at http://www.heart4myhome.blogspot.com/. She is so sweet and if you are ever in the need of an uplift in your day that is the place to go. She has such a positive outlook you cant help but feel it.

I am gonna pass this on to Christine at http://www.mistressofcakes.blogspot.com/. She is a new friend and she is a sweetie. She also has some great looking stuff over there.

and

Cheryl at http://www.cookindunkinstyle.blogspot/. She probably doesnt know it but I have been stalking her page for awhile and she has just the best stuff. Everything she has on there I love and I wanna make everything. AND she has the cutest pup!

You girls inspire me everyday! Thanks to all three of you!

Love,

Joan

Tuesday, December 16, 2008

Chicken Pot Pies


We are freezing. I mean its cold. Keep in mind we are in South Texas and we are sometimes wearing shorts on Christmas. Yesterday, the high was in the upper 30's. I had a fire in the fireplace all day long! It was so nice. My dogs love to go outside and play during the day but they went out to potty and couldn't get back in fast enough. Then they would sit at the door and wait for me to open it and then just kind of peek out and turn right around. On days like this I just gotta have something cooking. My middle daughter Sara is home from college with me so we made her favorite winter time food (though she does ask for it year round). A long time ago I got this recipe out of the school district cookbook. This is the best kind of book, where you can get peoples family recipes. I have changed it up and changed it up until it is now ours. It will be in our family favorites cookbook that I will start on after the first of the year. I just want to take a second here to thank everyone again that leaves me comments. I am going to answer each and every one. I appreciate them so much.


Chicken Pot Pies
2-3 lbs of chicken, cooked and deboned (about 3 cups)
1 cup of the chicken broth reserved from cooking the chicken
1 med sized bag of frozen peas and carrots
1 can cream of chicken soup
1 can cream of celery soup
1 large baking potato, cooked and cubed
1 1/2 teaspoons of pepper
1/2 teaspoon of salt
Crust:
1 cup of Bisquick-I like Bisquick, but you can use any kind of baking mix
1/2 cup milk
1 egg
Paprika

Preheat oven to 400 degrees.
Bring cup of broth to a slow simmer and add frozen veggies and cook for about 2 minutes. Add cream soups, salt, and pepper. Add your potato. Mix until heated through. Spray 6 (2 cup size) ramekins with non stick spray. You can also use an 11x7 pan or pie pan. Prepare your crust:
Add bisquick, milk and egg and mix with a fork. This will be a little runny. Pour about 1/2 cup over each ramekin filled with chicken mixture. Sprinkle with a little paprika and bake for 20 minutes.


These are your ingredients. I accidently grabbed two cream of chicken soups. One is supposed to be cream of celery!! That on the right is my chicken broth. I love those measure cups that let you seperate the fat!


Boil your chicken with some salt, pepper and some chopped up onions. I used all thighs this time.


Boil your veggies in the broth and cook your potato at the same time.


After your veggies are cooked a little, add soups, seasonings and potato.


Just three ingredients for your crust mixture. Easy Easy Easy!


Pour about 1/2 cup over your filling.


Sprinkle with paprika and bake.


This is the baked pot pie. The crust on top is just enough bread to go with the filling. This was perfect on a super cold day. It will warm you all over.

Sunday, December 14, 2008

Blueberry Peach Cobbler

Hello Everyone!! I hope everyone is enjoying the beautiful holiday season. At this very stressful time of year one of my few "surefire" relaxation techniques is to get in the kitchen and have my mind totally forget about everything and just create something. Being in my kitchen and getting the ingredients together to make something is just the best atmosphere to me. I've got my little dogs at my feet, the oven pre-heating and dishes clanging and I am totally content. My oldest daughter seems to be catching on to this same thing. She will walk in the door after work and say "Mama, lets cook something". She is learning to unwind the same way. I had some blueberries that I needed to use up so she made her cobbler. It is a Paula Deen recipe and she has tweaked it to make her own. I told her the other night that it came out better than it normally does and she told me, "well, it because I didn't really measure anything". LOL! Yep, shes made it more than a few times!


Dutch Oven Peach Cobbler


2 16 oz cans sliced peaches in syrup or juice
1 pint fresh blueberries

1/2 cup baking mix-we used bisquick

1/3 cup sugar

Ground Cinnamon

Topping:

2 cups baking mix

1/4 cup sugar

1/4 cup butter, melted (1/2 stick)

1/2 cup milk

Cinnamon Sugar (1/4 cup sugar with 2 teasoons ground cinnamon, mixed well)

Spray a dutch oven with vegetable oil cooking spray

Drain 1 can of peaches. Combine both cans of peaches (one drained, one not), blueberries, baking mix, sugar and a (liberal, cause I love it! )sprinkling of cinnamon.

To make topping: Combine, baking mix, sugar, butter and milk in a mixing bowl. Drop bits of dough all over the top of peach mixture. Sprinkle with cinnamon-sugar mixture.

Bake at 350 degrees for 45 min.
We found that the original recipe called for too much baking mix. We cut it down because it came out with too much crust. Now its perfect and this is great with some Blue Bell vanilla bean ice cream!


She baked this in my cast iron dutch oven with a glass lid. And she baked it covered. This is the filling mixture in the cooking sprayed dutch oven.

This is how your topping mixture should look. Not too dough-ey!

I told her she better use a bunch of cinnamon cause thats how this mama like it!!

It turned out beautifully. I'm so proud of the little baker she is becoming!

I love the feeling I get when my kids let me know how much they love the food that I cook and I see the interest in cooking that it stirs up in them. It warms my heart to think of all the memories that we are making.

I hope everyone has a wonderful week ahead.

Thursday, December 11, 2008

My girls christmas pictures!

L to R: Lauren, Jena and Sara

L to R: Lauren, Jena and Sara

Wednesday, December 10, 2008

Build a Gingerbread House Party!

This past weekend my girls decided to invite their friends over and have a Gingerbread House Building Party. We all had so much fun! My husband and I made wassail and made sure everyone had a cup and we just took pictures and laughed so hard our cheeks hurt. Once the kids got started they all became very competetive. The younger girls kinda had partners and they were snapping at each other and it was so funny. Here are some pics. I wish I could show you all of them but I would be here all night downloading! This is the highlights.
Jena and Sara with a few of the decorations! We had tons. We went through about 10 boxes of graham crackers and pounds of candy, frosting and marshmallow cream.


It was fairly neat before they started but by the time they were finished it was everywhere including all over the kids!


Smiling pretty for me! L to R: Ryder, Alissa, Chelsea, Jena, Matt, Astrud and Emily! I just love these kids.

Sara and Jennifer. The college girls.

The finished houses. I thought they turned out great.

I had to show you this one. It was Alissa and Ryders. It is so funny, it looks like a doublewide!!

Monday, December 8, 2008

Red Velvet Cookies


I am going to share with you all my favorite Christmas cookie. I guess it could be an anytime cookie but it does seem kinda perfect for the holidays. I havent made much lately that is blog worthy but this certainly is. The cream cheese frosting on this cookie really make it. It is also a soft cookie which I love. I hope everyone is enjoying their holiday season and is not getting stressed out!
Love to everyone!

I know my pictures this time are just not good, but this is what you will need.


Combine your sugars and butter, beat then your baking soda and salt, then your egg.

It really starts to get you in the holiday mood when you get to add the food color, I love that part!

After rollling your dough into balls and bake them, this is what they look like. Soft and delicious!

I used a little decorator I got at Target for $2.50. My frosting was a little soft but I just put it in the fridge for a bit and it was great.

RED VELVET COOKIES

2-1oz. squares unsweetened chocolate

1stick butter

2/3 cup brown sugar

1/3 cup white sugar

1/2 teaspoon baking soda

1/2 teaspoon salt

1 large egg

1 tablespoon red food coloring

1/4 cup sour cream

2 cups flour-packed down when you measure

1 cup (a 6-oz package) chocolate chips

Line cookie sheets with parchment paper and then spray them with non stick spray. Unwrap squares of chocolate, break them apart and microwave for about 1 min. Stir them until they are smooth and set aside while you mix up your dough. Combine butter, brown sugar and white sugar together, beat them on med. speed of an electric mixer about 1 min. Add baking soda and salt, resume beating until mixed together. Add egg, mix again. Add food color and mix together another 30 seconds. Shut off mixer and scrape sides of bowl. At low speed, add one cup of flour. When that is mixed in, add sour cream. Scrape sides and add remaining 1 cup of flour. Mix in chocolate chips by hand. Roll into walnut sized balls and bake for 9-10 minutes. Slide parchment paper from cookie sheets onto wire rack and let cool. Place on waxed paper to cool and prepare your frosting.

CREAM CHEESE FROSTING

1/2 stick butter

4 oz. cream cheese

1/2 teaspoon vanilla

2 cups powdered sugar

Soften butter and cream cheese. Mix in vanilla and powdered sugar until smooth and creamy. Spread on your cookies.

I hope you all try it, you will love it!

Wednesday, December 3, 2008

Spicy Meatballs or Not!!

Earlier this year my in laws lived with us for a bit while they were transitioning to go stay with my sister in law in Honduras. These people can cook! While they were here, my father in law, Bob, made us these meatballs several times. They are so simple and so quick, yet they taste so delicious. Yesterday, we were trying to figure out what we would have for supper and we are still in the mode of "using things up" since Thanksgiving. There are no weird ingredients and most people have all this stuff on hand. Well, after we made them and we were standing in the kitchen trying them out. Our mouths started burning. We dug through the trash and found that the bread crumbs I bought were ZESTY flavored. They had crushed red peppers in the ingredients. I thought they were great that way since I absolutely love spicy stuff. However, the family decided they were good but better with just regular bread crumbs. This is a pretty self explanatory recipe so I didnt take many pictures. The sauce we used was some that we had put up back in the summer when we had a ton of tomatoes. I used a quart and of course I added some parmesan and a little whipping cream to taste just because I have to. Just something I do, I gotta mess with it. I hope you all like this diversion from "Thanksgiving" food. I was in overload with all the holiday stuff I was cooking!


Put a little of your sauce in the bottom of a 13x9 pan.
After mixing up your meat mixture, make the balls the size of a small fist. Then fry them in about an inch of olive oil.

After browning your meatballs pretty good, place them on top of the sauce.

Put the rest of your sauce over the meatballs and cover with some mozarella and provolone and bake at 350 degrees another 20 minutes or so.
Meatballs
2 lbs. lean ground meat
2 cups bread crumbs, seasoned however you want!!
1/2 cup finely chopped onion
1 garlic pod, minced
1/2 cup grated parmesan
2 tsp. oregano
1 tsp. salt
1/4 tsp. black pepper
2 eggs.
About of a quart of your favorite Italian marinara
Mix all together and brown in olive oil. Place in a 13x9 pan with some of your sauce in the bottom of the pan. Cover with remaining sauce and 1 cup each of mozarella and provolone and bake about 20 min. in 350 degree oven. Serve with nice salad and garlic bread!!
I hope everyone is having a wonderful week and I want to say THANK YOU to everyone who reads and leaves me a comment. You make my heart swell, I love reading them.
Love,
Joan

Saturday, November 29, 2008

Odds~N~Ends!


Hello everyone, I hope that everyone had a very nice holiday! Our Thanksgiving was great. We celebrated with family and friends and had some great food. I am an only child and my mother and father come to my house to have our meal. I made turkey, dressing, broccoli rice casserole, green bean casserole, mashed potatoes and my buttery butterhorns. My mom made, squash, and fruit salad. Oh, and we also had the obligatory cranberry sauce. Now for dessert we just go a little nuts. My daughter made a cream cheese pound cake that was just wonderful! I made pumpkin delight (a casserole type that I have been making for about 10 years). And I made a chocolate pie my husband requested. I am sad to say that is the only recipe I can blog about today. The last few days have been a blur. With all the cooking and preparation I just didn't think. I would love to share all these recipes but I had so many things going at once I just didn't get a chance to grab my camera! We also have a tradition of waking up early and going shopping with our best friends Priscilla and Ron. Yesterday we had alot of fun and just went all day!! We make it fun with a long lunch and a stop at Starbucks for one of their seasonal drinks. Any of you who know me know that I have a love affair with Starbucks. I could sit in there all day and just smell! We had alot of fun. We already look forward to next year. This year we ended the day with a movie. I finally saw Twilight. I have read all the books and the movie was very good. We also found time (before Thanksgiving) to put up our Christmas tree which is my favorite thing to do of all time. It is just magical and we love talking about each ornament and the story behind it. I am going to post a few pictures and then I will show you the best chocolate pie in the world!


Our Christmas Tree. I wish I could show you all the ornaments. It turned out beautiful!

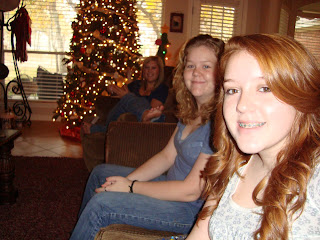
My beautiful daughters, Lauren (in back), Sara, and Jena up front.

My kitchen tree! I am showing you unlit because with the lights on you cant see the "kitcheney" ornaments!

Now.....on to the cooking. Here is the best Chocolate pie ever!

Joans Chocolatey Pie

3 squares unsweetened chocolate
3 cups milk

1/2 teaspoon salt

2 tsp. butter

1 cup sugar

3 tbsp. flour

3 tbsp. cornstarch

3 egg yolks

1 1/2 teaspoons vanilla

Deep dish pie shell, baked

Heat 2 cups of milk and chocolate on medium heat until it boils. Mix all dry ingredients in a bowl. Add egg yolks, vanilla and 1 cup of milk. Once milk-chocolate mixture boils, add other ingredients. Return to a boil and boil 1 minute. Pour into baked pie shell. Cool completely and top with Cool Whip and chocolate chips.

This is the ingredients you will need.

This is your milk and chocolate squares, just bring it on to a boil

Add the rest of the ingredients and cook til thickened.

Pour your filling into an unbaked pie shell.

TaDaaa! All you gotta do now is put your Cool Whip and choc chips or choc shavings and its done!

It is so good!